Since version update 2.4, the Controller script has the capability to get past the limitation of a non-convex MeshCollider with a non-kinematic Rigid body introduced with Unity 5.0.

This feature requires a few changes in your typical workflow such as rearrangement of the components and disabling MeshColliders. To understand the specifics of such changes, we will have a closer look at the example involved in the Weapon_Range_RigidBody_Fix scene.
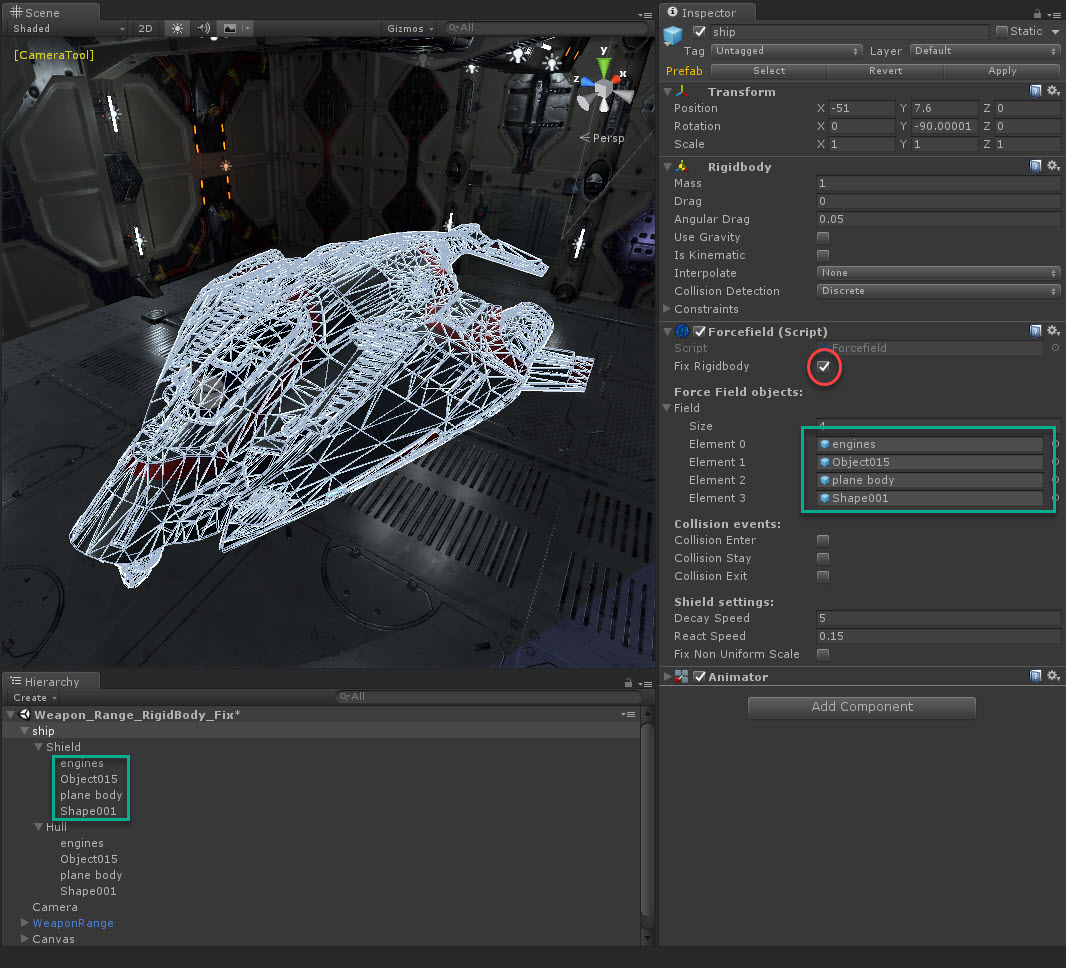
To start out, the parent object “ship” contains two sets of subobjects representing various parts such as engines, sensors, etc. One set of meshes used to render the actual geometry of the ship and the other is the Force Field surface covering particular components.
The key elements reside on parent “ship” including Rigid body and Force Field Controller. Notice the Controller’s Field slots stacked with shields marked with a green rectangle on the screenshot. This is one of the important differences along with the shield surface setup.
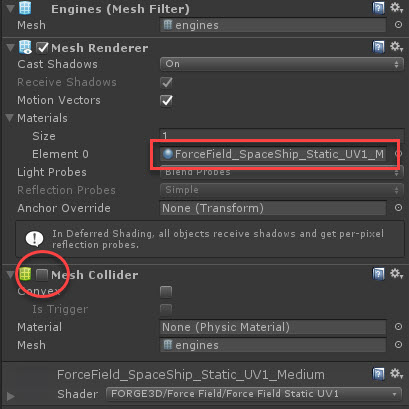
Looking at the “engine” child under the Shield game object first thing to be aware of is the absence of Force Field Controller. When using “Fix Rigidbody” option, you no longer have to put the Controller on each shield instance, but instead, attach one instance to your top most object. That said, the Controller will automatically detach the slotted shield pieces and will carry them along.
One more thing to keep in mind is the MeshCollider component should be disabled on each shield element the hierarchy. It is a necessary step that will help bypass the errors thrown by Unity into the console.
To wrap up this chapter let us highlight the most important steps in non-convex mesh and non-kinematic rigid body workflow:
- Keep a SINGLE Force Field Controller instance on the top most object
- Fill in the “Field” slots with shield elements contained within the parent
- Avoid adding a Force Field Controller to shield objects
- Keep MeshColliders disabled