Force Field: Getting Started

This guide describes basics of the Force Field integration in Unity Engine.

A fundamental understanding of Unity Engine, as well as C# programming language is assumed. Basic familiarity with Unity Shaders and Visual Effects Design is advantageous, but not a requirement.

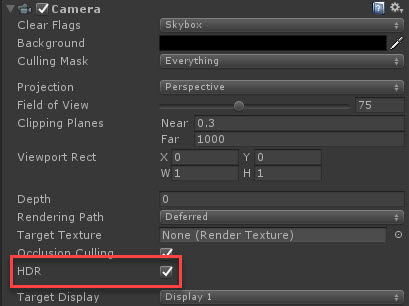
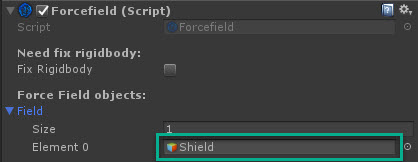
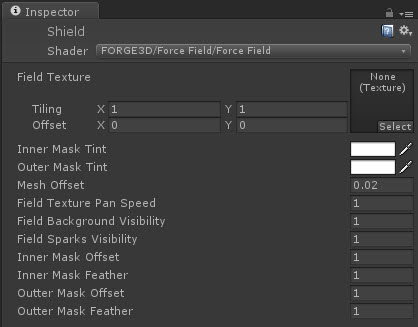
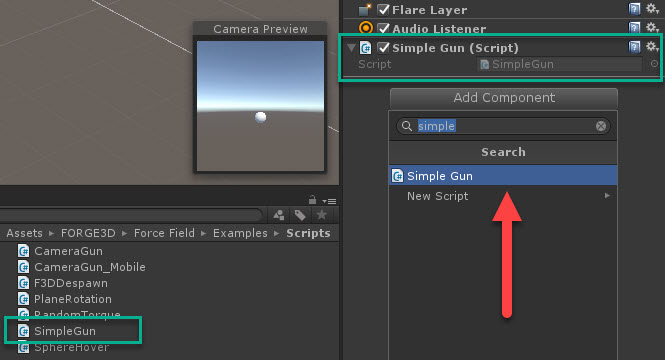
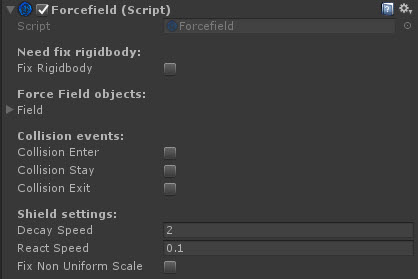
Force Field is a shader based solution that renders a visual effect on a mesh surface. The connection between your code and the Shader is accomplished through the Force Field Controller component.

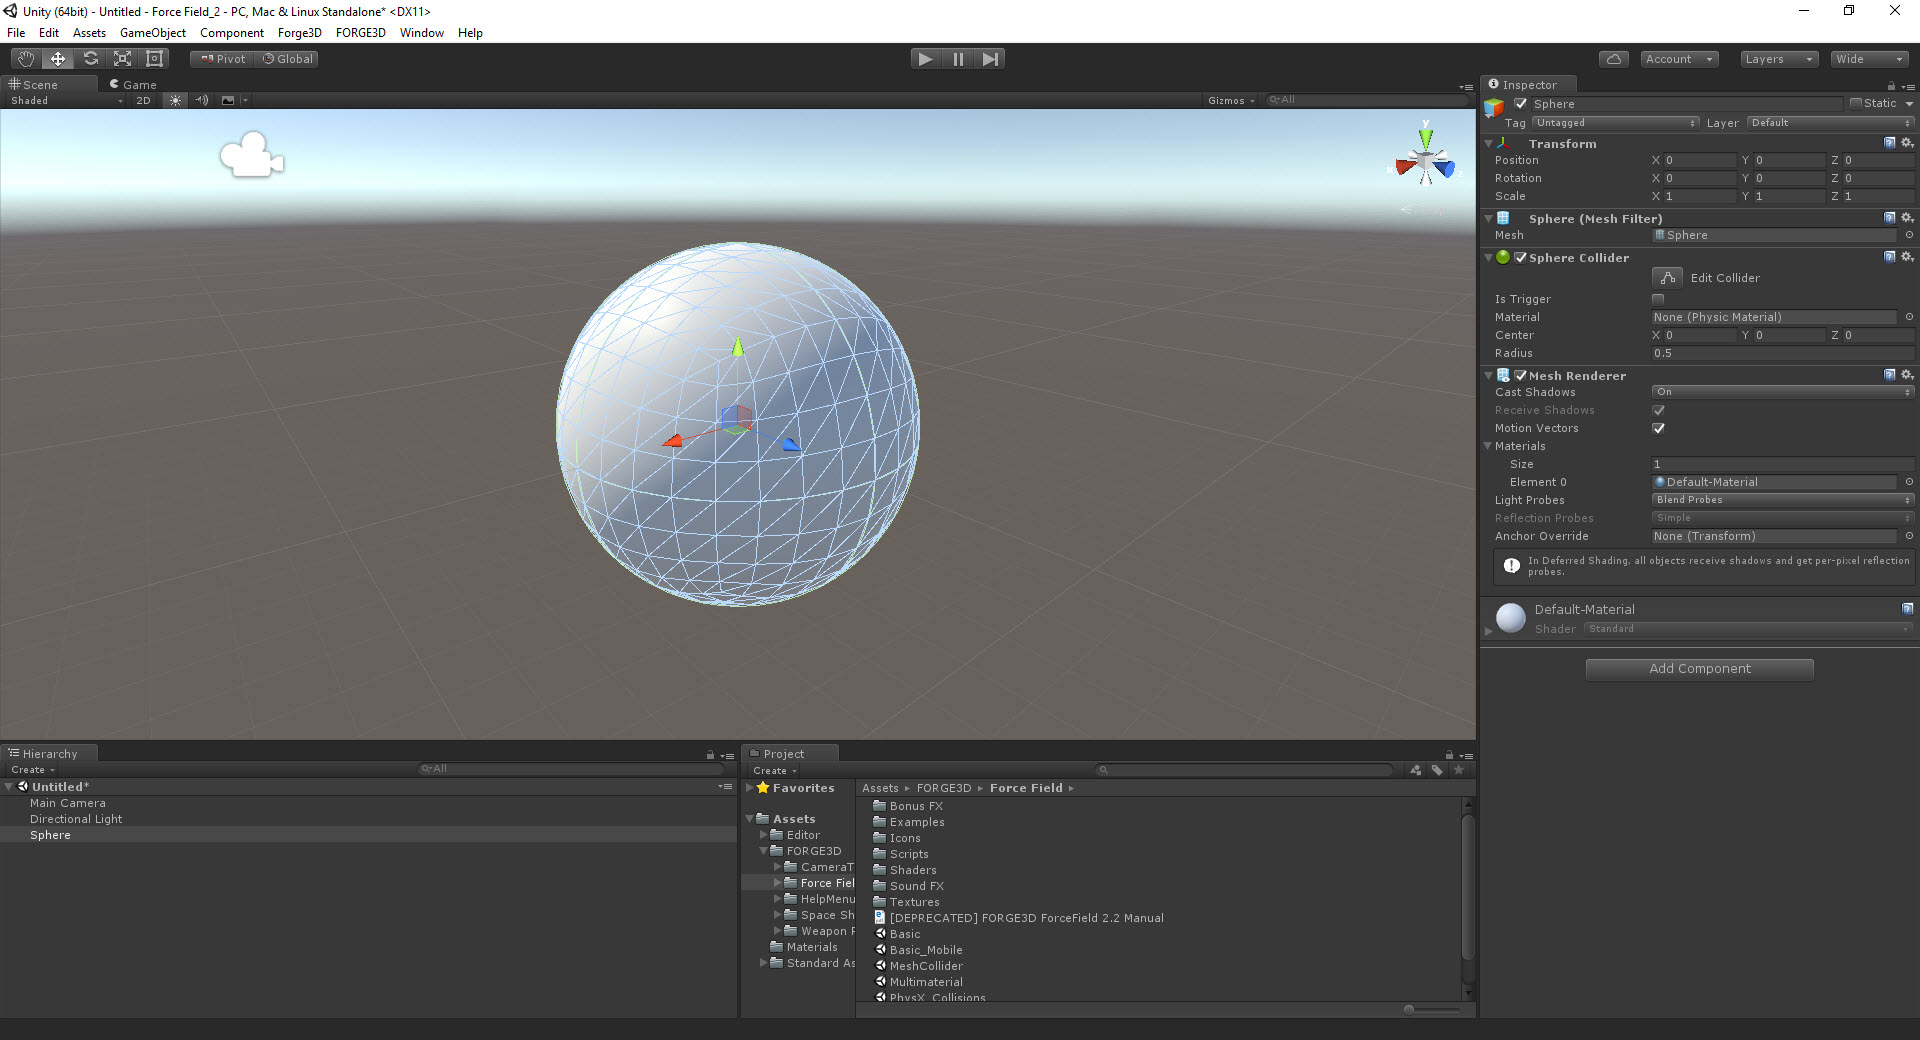
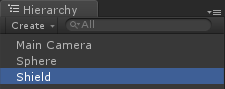
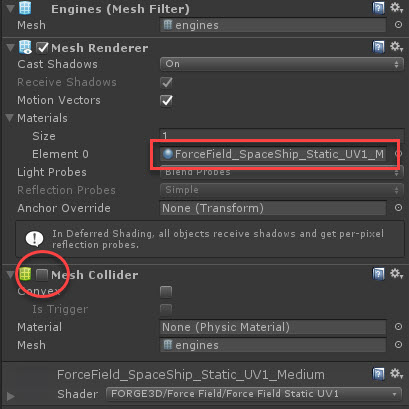
A collider is required to capture a point of an impact which then passed further to a Force Field Controller. A collider mesh should be identical with the mesh of a MeshRenderer used to represent the shield itself.

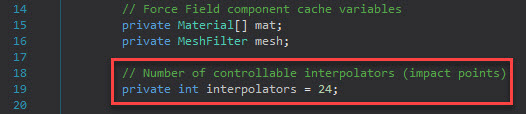
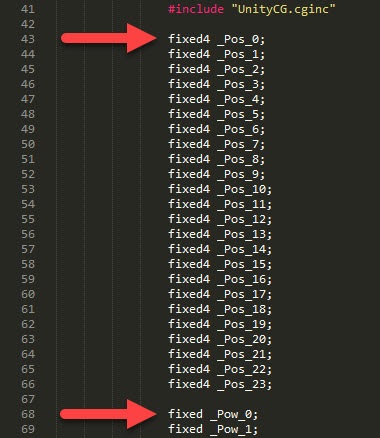
To issue a hit point rendering a world space coordinate has to be extracted from results of a ray cast against the collider and sent to a public OnHit(…) method of a Force Field Controller. It is also possible to pass a hit spot size and initial alpha value as additional parameters.

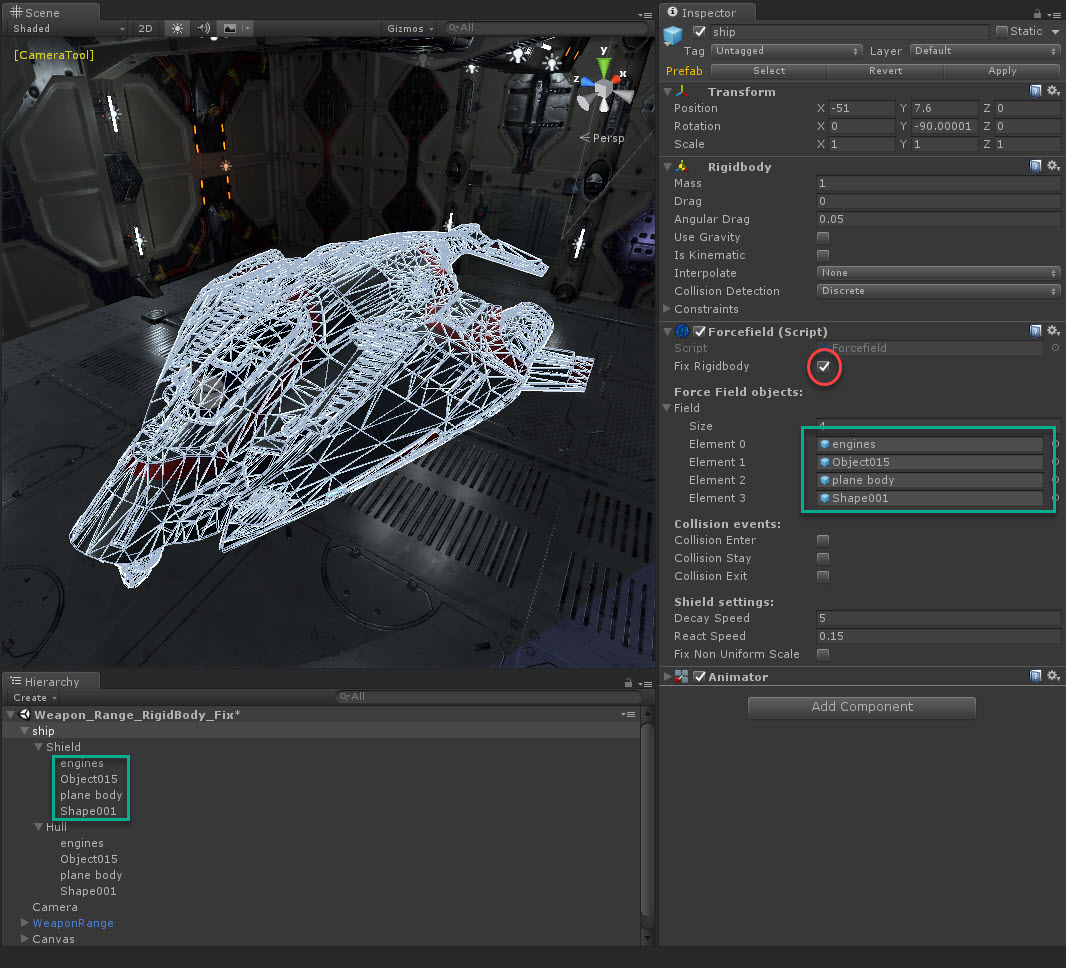
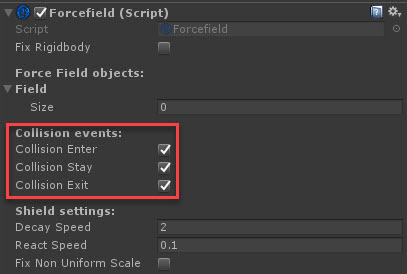
Rigid body collisions can also be used to supply impact coordinates through the system of Unity events. The collision events only sent in case of one of the colliders has a non­kinematic rigid body attached.

Known Issues

Please check the list of known issues and solutions in the Known Issues thread. Not all problems are necessarily posted there, but we do our best to post updates promptly.

Found a bug?

Please submit a case in the Bug Report thread. We will be there to squash the bug away!

Want to share your thoughts?

We sincerely appreciate your time to provide us with comments, feedback, and suggestions. There are always things that we could do better. Please share your ideas in the Feedback and Suggestions thread.

Have a question or need help?

If you have an urgent problem that is not documented here, please reach us out directly via the Contact Form. For non-urgent questions get in touch in the Technical Support thread and we will get back to your as soon as we can!

Upgrading from previous version

Before you start

Version 2.4 of Force Field made some changes to the underlying folders and the structure of its assets. We also introduced the Effects & Hangar level and made changes to the shader path names.

  • Nevertheless, the upgrade should be a painless process. We highly encourage you to do a backup of your project before proceeding.

Download and import

  • To start out with the upgrade, download the package, and import the Force Field 2.4 into your project.

Important

There might be a console error affecting users from using Force Field 2.4 due to redundant references kept by the AssetStoreTools which caused parts of the Standard Image Effects and Cinematic Image Effects trap into the package at the moment of the asset submission. So if this is your case, head here for the solution on our Forum.

  • In the Import Unity Package window, click “All” and then click “Import” to proceed with the upgrade.

Platform Differences

Force Field ships with a set of scripts and shaders best suited for both Desktop and Mobile. Due to low-end platform limitations, though, the Mobile version has its set of features stripped providing decent performance over visual quality.

Limitations on the Mobile include:

  • Amount of simultaneous impact points is limited to 6
  • Impact spot size and alpha control from script is unavailable
  • Mask options limited to Inner Mask only
  • “Sparks” texture effect is unavailable
  • Rigid body collisions limited to “OnCollisionEnter.”

Important information:

A mobile version of the shader (ForceField_Mobile or ForceField_Static_Mobile) requires a mobile version of controller script (Assets/FORGE3D/Force Field/Scripts/ForceField_Mobile.Cs).

Changelog

The latest Force Field Update 2.4 is loaded with features that will enhance your experience in various ways. We’ve improved the overall Shield system, allowing you to make it easier to apply to a complex surface, such as Ships meshes cluttered with the details by utilizing the built-in Unity’s UV1 unwrapping. We’ve changed the example scenes with a brand-new PBR Reactor and Hangar Example along with the new Wasp Interdictor model to demonstrate how you can get back to the MeshCollider and the Rigidbody pipeline. We’ve also added new shader variations including the Edge Fade and Vertex Animation already seen in our Planets what makes Force Field even better in exciting ways.

[Version 2.4] – Current

  • PBR Space Ship model with docking animation
  • PBR “Reactor & Hangar” scene
  • Edge Fading and Vertex Animation shader
  • UV1 shader to use with an automatic lightmap unwrapping which helps fitting shield texture on a complex mesh
  • RigidBody and MeshCollider should be fixed now! Check the new example scene
  • The FORGE3D menu in the Unity Editor includes several new links and categories

Example Scenes

Recommended setup

Before you can start with the example scenes it is advised to perform fine tuning of the editor according to the suggested checklist:

  • Enable Linear Color mode and set Rendering Path to Deferred

Enabling linear rendering in Unity is simple: It is implemented on a per-project basis and is exposed in the Player Settings which can be located at Edit -> Project Settings -> Player -> Other Settings

Read more: Linear Pipeline in Unity Manual

  • Enable HDR on your camera

HDR is enabled separately for each camera using a setting on the Camera component. More convincing visual effects can be achieved if the rendering is adapted to let the ranges of pixel values more accurately reflect the light levels that would be present in a real scene.

Read more: High Dynamic Range Rendering

  • Import Image Effects

Image effects are Standard Assets that provide a quick, simple way to change the look of your game. These can be located at Assets -> Import Package -> Effects

Read more: Image Effects

  • Download and Import FREE Cinematic Image Effects

Unity is currently developing a number of new Image Effects. The package can be downloaded from the Asset Store: http://u3d.as/mHd

Read more: Cinematic Image Effects

Force Field Quick Start

The easiest way to understand the basics is to create your first Force Field object.  Let’s get started with a new scene and a few things to help us along. We will use one object to render the shield effect and the other to render a surface it covers. Why not pick a sphere?

Creating geometry

  •  Create sphere from Unity menu GameObject -> Create Other -> Sphere and place it in front of the camera
  • Duplicate the Sphere game object using Edit -> Duplicate menu and rename it to “Shield“. Select Sphere game object and remove Sphere Collider component.

Adding a controller

Next thing required is a controller script. Let’s add one to the Shield and assign the game object reference to be used as a shield surface.

  • Add Forcefield.cs script component to the Shield game object using the inspector’s “Add Component” either manually from Assets/FORGE3D/Force Field/Scripts folder by dragging it on top.
  • Select Shield game object in the Hierarchy panel and drag it on top of the empty ‘Field‘ property of the Force Field Controller within the Inspector.

Adding a material

It’s time to create a new material and assign it to the Shield. We will use Force Field shader to render the shield and the corresponding effects.

  • Create new Material in Project panel: Right Click -> Create -> Material and name it “Shield“.
  • Select the material and pick FORGE3D/Force Field/Force Field shader from the drop down list.

Shader setup

Force Field ships with a set of textures to help you create various kinds of shield effects. In this chapter, we will set the shield, its colors, and different properties so it looks and feels the way it should.

  • Plug the texture mask into the Field Texture slot, such as “field_charge_003“, which can be found under the Assets/FORGE3D/Force Field/Textures path, and set the texture tiling to 8 on X and 4 on Y  to help the spherical shield appear in a more pleasant way.

Next important step is to set up a shield color gradient with help of both Inner and Outer Masks Tints. Note the alpha value is used to boost the multiplier, and it is vital to get it shine with your juicy Glow Image Effect.

  • Set ‘Inner Mask Tint‘ RGBA color values to (R: 130, G: 220, B: 255, A: 40 / HEX Color #82DCE128)
  • Set ‘Outer Mask Tint‘ RGBA color values to (R: 0, G: 150, B: 255, A: 40 / HEX Color #0096FF28)

The “Mesh Offset” will push the shield along its normals and the “Pan Speed” will animate the texture so you shield looks more like alive. So leave the positive default values as it is more than enough for our purpose.

Now it’s time to set shield feedback at the moment of impact. “Background Visibility” is the first layer that makes the effect.

  • Set “Field Background Visibility” value to 2

Sparks” are the eye candy which makes texture masks shine at the moment of its intersection. Let’s set it’s visibility as well:

  • Set “Field Sparks Visibility” value to 3

Inner Mask” will flash first at the point of impact and will fade inwards by the speed of the “Decay” parameter controlled from the Force Field script. “Offset” specifies the size of the original mask where higher values will make the mask appear smaller due to POW function.

  • Set “Inner Mask Offset” value to 8
  • Set “Inner Mask Feather” value to 8

Feather” controls how smooth the mask should be drawn. Let us set some values to get the hang of it before diving into much of the technical details. The additional “Outer Mask” will reveal at the impact point spreading outwards and forming a “blast wave” effect:

  • Set “Outer Mask Offset” value to 4
  • Set “Outer Mask Feather” value to 4

Triggering the shield

Last chapter concluded the shield set up and it is about time to wreck the havoc on the field. The Force Field controller you have attached earlier will handle such task of assuring the shield reacts accordingly to the damage dealt.

To simplify things, you will use a SimlpeGun.Cs that simulates the projectile cast from camera’s screen point beneath your mouse cursor.

  • Attach the SimpleGun.Cs script to the camera. You will also find it located under the Assets/FORGE3D/Force Field/Examples/Scripts folder.

Blast it!

We went through the process of a shield assembly from scratch, and now everything is ready to launch into the game mode and trigger the shield.

  • Hit Play within the editor and click and hold the Left Mouse Button on top of the sphere.

Force Field Controller

The Controller component handles the Shield shader behaviour by acquiring impacts sent through the OnHit() method.

  • Fix Rigidbody” – Enables a workaround to the Unity limitation introduced starting with version 5.0 and higher, where a MeshCollider and a Rigidbody no longer work together attached to the same object leading to an error spam in the console.
  • Field” – A reference to a Shield object(s) to control.
  • Collision Enter” – The shield will respond to a collision when its collider/rigid body has begun touching another rigid body/collider.
  • Collision Stay” – The shield will respond to a collision once per frame for every collider/rigid body that is touching its rigid body/collider.
  • Collision Exit” – The shield will respond to a collision when its collider/rigid body has stopped touching another rigid body/collider.
  • Decay Speed” – The speed at which the current hit points are faded away. Higher decay value leads to a faster decay. Setting the value to zero will freeze the effect. You may use this feature to fine-tune the shield.
  • React Speed” – A time gap in milliseconds at which the controller registers new hits. A zero value will remove a limitation, and a value of one will limit to one hit per second.
  • Fix Non Uniform Scale” – This option is designed to help with setting a shield affected by a scaled transform.

Rigidbody and MeshCollider

Since version update 2.4, the Controller script has the capability to get past the limitation of a non-convex MeshCollider with a non-kinematic Rigid body introduced with Unity 5.0.

This feature requires a few changes in your typical workflow such as rearrangement of the components and disabling MeshColliders. To understand the specifics of such changes, we will have a closer look at the example involved in the Weapon_Range_RigidBody_Fix scene.

To start out, the parent object “ship” contains two sets of subobjects representing various parts such as engines, sensors, etc. One set of meshes used to render the actual geometry of the ship and the other is the Force Field surface covering particular components.

The key elements reside on parent “ship” including Rigid body and Force Field Controller. Notice the Controller’s Field slots stacked with shields marked with a green rectangle on the screenshot. This is one of the important differences along with the shield surface setup.

Looking at the “engine” child under the Shield game object first thing to be aware of is the absence of Force Field Controller. When using “Fix Rigidbody” option, you no longer have to put the Controller on each shield instance, but instead, attach one instance to your top most object. That said, the Controller will automatically detach the slotted shield pieces and will carry them along.

One more thing to keep in mind is the MeshCollider component should be disabled on each shield element the hierarchy. It is a necessary step that will help bypass the errors thrown by Unity into the console.

To wrap up this chapter let us highlight the most important steps in non-convex mesh and non-kinematic rigid body workflow:

  • Keep a SINGLE Force Field Controller instance on the top most object
  • Fill in the “Field” slots with shield elements contained within the parent
  • Avoid adding a Force Field Controller to shield objects
  • Keep MeshColliders disabled

Rigidbody Collisions

Force Field is proficient at handling Rigid body collision events sent by Unity Engine in the following methods:

OnCollisionEnter, OnCollisionStay and OnCollisionExit

136
137
138
139
140
141
142
143
144
145
146
147
148
149
150
151
152
153
154
155
156
        // COLLISIONS EVENTS
        void OnCollisionEnter(Collision collisionInfo)
        {
            if (CollisionEnter)
                foreach (ContactPoint contact in collisionInfo.contacts)
                    OnHit(contact.point);
        }
 
        void OnCollisionStay(Collision collisionInfo)
        {
            if (CollisionStay)
                foreach (ContactPoint contact in collisionInfo.contacts)
                    OnHit(contact.point);
        }
 
        void OnCollisionExit(Collision collisionInfo)
        {
            if (CollisionExit)
                foreach (ContactPoint contact in collisionInfo.contacts)
                    OnHit(contact.point);
        }

The collision data sent with these events is redirected to the shader throughout the OnHit() method. It is pretty similar to a ray casting technique mainly used to invoke the effect from a script.

Response to collision events can be switched using checkboxes in the Controller component:

Important

  • Collision events are only sent if one of the colliders also has a non­kinematic rigid body attached.
  • If there is a reason not to use Rigid Body vs Force Field collisions it is best to comment corresponding sections in Controller script to avoid unnecessary amounts of data sent into these methods.

To get more on collision events and rigid bodies, refer to the official manual pages:

Force Field Shaders

The Force Field includes several various types of shaders available in the Assets/FORGE3D/Force Field/Shaders/ folder.

Bellow is the description of these shaders. Click the shader name in the tab to switch.

Shader Path: FORGE3D/Force Field/Force Field

ForceField is the default shader with just the basic options and 24 simultaneous impacts enabled. Check the Force Field Quick Start section of this manual to get the most of the details on the following shader.

  • Field Texture – The grayscale mask that is used by the shader to build up the visual shield effect.
  • Inner Mask Tint –  Set up a shield color on the Inner part of the impact splash.
  • Outer Mask Tint – Set up a shield color on the Outer part of the impact splash.
  • Mesh Offset – Pushes the shield mesh along its normals.
  • Field Texture Pan Speed – Animate the texture offset of the masks.
  • Field Background Visibility – Is the first layer that makes the shield feedback at the moment of an impact.
  • Field Sparks Visibility – Makes texture masks shine at the time of their intersection. Best used with Field Texture Pan Speed.
  • Inner Mask Offset – Will flash first at the point of impact and will fade inwards over time.  Specifies the size of the original mask where higher values will make the mask appear smaller due to POW function
  • Inner Mask Feather – Controls how smooth the Inner Mask should be drawn.
  • Outer Mask Offset – Will reveal at the impact point spreading outwards and forming a “blast wave” effect.
  • Outer Mask Feather –  Controls how smooth the Outer Mask should be drawn.

Shader Path: FORGE3D/Force Field/Force Field Static

The shader includes everything the default ForceField shader has plus a new Static Field. Use it if you’d like your shield to render itself all time. The impact effects will be drawn on top the existing Static Field.

Shader Path: FORGE3D/Force Field/Force Field Mobile

Due to low-end platform limitations, the Mobile version has its set of features stripped providing decent performance over visual quality.

Limitations on the Mobile include:

  • Amount of simultaneous impact points is limited to 6
  • Impact spot size and alpha control from script is unavailable
  • Mask options limited to Inner Mask only
  • “Sparks” texture effect is unavailable
  • Rigid body collisions limited to “OnCollisionEnter.”

Important information:

A mobile version of the shader (ForceField_Mobile or ForceField_Static_Mobile) requires a mobile version of controller script (Assets/FORGE3D/Force Field/Scripts/ForceField_Mobile.Cs).

Shader Path: FORGE3D/Force Field/Force Field Static Mobile

The shader includes everything the Mobile shader has plus a new Static Field. Use it if you’d like your shield to render itself all time. The impact effects will be drawn on top the existing Static Field.

Important information:

A mobile version of the shader (ForceField_Mobile or ForceField_Static_Mobile) requires a mobile version of controller script (Assets/FORGE3D/Force Field/Scripts/ForceField_Mobile.Cs).

Shader Path: FORGE3D/Force Field/Force Field Static UV1

The shader includes everything from the Static shader and its texture lookup is using the UV1 channel for automatically unwrapped shields.

See the Complex Surfaces chapter of this manual to learn more.

Shader Path: FORGE3D/Force Field/Force Field Static Vertex Animation Edge Falloff

The shader includes everything the Static shader has plus Vertex Animation and Edge Falloff.

  • EdgeFalloff Exp – The exponent grows the mask at the edges of the shield so that it renders masked zones invisible over the higher values.
  • EdgeFalloff Power – The multiplier value that helps with the edge control.
  • Vertex Tile – The segmentation of the vertices taken into account. Higher values produce a disorganized vertex offsets.
  • Vertex Speed – The time multiplier at which the animation takes place.
  • Vertex Power – The strength of the vertex expansion applied during the animation.
  • VertexFalloff – The exponent of the mask at the edges of the shield neglecting the animation.

UV1 Shader

I am text block. Click edit button to change this text. Lorem ipsum dolor sit amet, consectetur adipiscing elit. Ut elit tellus, luctus nec ullamcorper mattis, pulvinar dapibus leo.

Fine Tuning the Shield

This tutorial explores the best available options to set the various shield material values achieving the top-line result. You will learn how to create a shield from scratch and a few valuable tricks to apply in the process.

Let us know if you have comments or questions in this Thread of the Forum.

Impact Points

By the default, Force Field processes up to 24 concurrent impacts in a Desktop and up to 6 in a Mobile version of the shader.

These are the steps to adjust number of simultaneous impacts processed:

  • Open Force Field Controller script (Forcefield.cs) and change interpolators value
  • Open Force Field Shader (Forcefield.shader) and find the line starting with #include “UnityCG.cging”

Notice two following lists of fixed4 _Pos_ and fixed _Pow_ declarations both starting with 0 indexes and ending with 23. Modify both lists, so they match to a number of interpolators you previously set in the Forcefield.Cs script.

For example, if you changed the interpolators from the default to a value of 8, you should set the indexes starting from 0 and end with 7.

Don’t be surprised by a number of variables required modifying by hand. Unfortunately passing an array wasn’t possible at the moment of Force Field release. Despite the fact, we look into available options considering Unity 5.4.0+ features and will be rolling new updates including even more simultaneous impacts shortly.

  • In shader, find a fragment section defining a number of interpolators and local array declarations. Adjust the interpolators value and array lengths according to a new number of impact points.
  • A few lines down bellow in the shader are two lists of pos[] and power[] array initialization. Adjust their names and indexes to correspond to the number of impacts you set earlier.
  • Lastly, go to the first line of the shader and change its name string to reflect the number of points then save the file by giving a different name. Switch back to the Editor and wait for it to compile.

Unity won’t tell you a word on the successful compilation. You can now switch to your modified shader in a drop-down list of a shield material.

Important

  • It is not recommended to increase the number of impact points in a Mobile shader due to platform limitations and a limited number of registers available on low-end platforms.
  • Raising a number of impact points too high will result in a performance decrease and should be used with caution.
Help Guide Powered by Documentor
Suggest Edit