Depending on the shader, the amount of available material parameters may change, although there are always a number of parameters that added with the Damage FX Function.
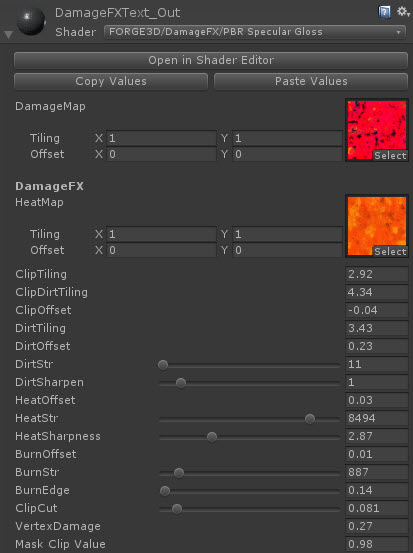
You should be already familiar with the Damage FX Script method input values from the previous chapter. In the image example the material values look somewhat identical. There are more parameters though and also two texture samples for damage masks and produced glow. The DamageMap holds the clip and dirt masks, while the HeatMap is used to generate the UV animated effect along the burn edge.
As an addition, there is a Vertex Damage parameter that will offset the geometry points affected by the impact along its normals based on the clipping mask.
You can tile clip and dirt masks by adjusting in values in the inspector, while the heat map should be tiled by the sampler’s x and y instead. It is also important to know that you might want to adjust your tiling when setting a material for a new mesh.
That said, with all the given parameters of the Damage FX Material, you can control its clip, dirt, heat and burn values globally. Keep in mind that the Function input values apply individually per point and based on your global settings in the material of the Damage FX Object.